Creating Simple:Press Plugins: Adding Component Settings
Introduction
This is the third in our series of articles on constructing plugins/extensions specifically for Simple:Press. Here are links to the first couple of articles:
In this article we will discuss how to create a separate screen for component settings that will be located under the Simple:Press FORUM->COMPONENTS area in wp-admin.
To do this, we will assume that you have created your Hello World plugin already (as discussed in the prior articles in this series). We will use that plugin as the base starting point for this article.
Hooking Into the Components Menu Option
In order to add a menu option under the FORUM->COMPONENTS menu, you need to hook into the sph_admin_menu action hook.
add_action('sph_admin_menu', 'sp_keywords_menu');In the above action hook, the callback is the sp_keywords_menu function. As with most action-hook call-backs in WordPress, it is a user defined function.
Inside that function we will create a “subpanel” as follows:
function sp_keywords_menu() {
    $subpanels = array(__('Keywords', 'sp-keywords') => array('admin' => 'sp_keywords_admin_options', 'save' => 'sp_keywords_admin_save_options', 'form' => 1, 'id' => 'keywordsopt'));
    SP()->plugin->add_admin_subpanel('components', $subpanels);
}
A ‘panel’ is simply a term that refers to an option screen in our FORUM admin area.
The critical function there is the SP()->plugin->add_admin_subpanel function call which takes two parameters: the menu name (‘components’) and an array containing the parameters for the panel to be painted. Lets take a closer look at this array.
The Subpanels Array
The array contains the following elements:
- Menu option text – in our example above, “Keywords”. This named array item is itself an array as well. It contains the following named items:
- admin – The callback function that does something when the user clicks the menu option. In this case we are defining a menu option called “Keywords”. When the user clicks on it, the sp_keywords_admin_options function will be called.
- save – The callback function when the user clicks the SAVE button on the panel. In this case our call-back function is ‘sp_keywords_admin_save_options’
- form – this is usually just 1. Check the appendix at the end of tis article for an explanation of when you might set this to 0 instead.
- id – a unique id for the subpanel
So, in our example, we created an array variable, $subpanels, with the properties of the panel we’re creating under the components menu. we then called the SP()->plugin->add_admin_subpanel function to paint the panel.
Display The Panel
The callback function for the “keywords” menu item under the Components menu is sp_keywords_admin_options. Lets take a look at what that function contains:
function sp_keywords_do_admin_options() {
	$options = SP()->options->get('keywords');

	spa_paint_options_init();
	spa_paint_open_tab(__('Keywords', 'sp-keywords'), true);
    	spa_paint_open_panel();
    		spa_paint_open_fieldset(__('Keywords Options', 'sp-keywords'), true, 'keywords-options');
    			$values = array(__('Notification', 'sp-keywords'), __('Private Message (requires PM plugin)', 'sp-keywords'), __('Email', 'sp-keywords'));
    			spa_paint_radiogroup(__('Select default type of notification to users for keyword usage', 'sp-keywords'), 'notification', $values, $options['notification'], false, true);
                spa_paint_input(__('Number of keywords a user can be notified of (0 is no limit - not recommended)', 'sp-keywords'), 'numkeywords', $options['numkeywords']);
                spa_paint_input(__('Minimum number of characters in a keyword (0 is no limit - highly not recommended)', 'sp-keywords'), 'numchars', $options['numchars']);
    		spa_paint_close_fieldset();
    	spa_paint_close_panel();
    	spa_paint_close_container();
}
This code should look familiar! We created something similar in our prior article.
First, that we are obtaining the array of existing settings using the call to sp()->options->get and storing that array in the $settings variable.
Second, we have some Simple:Press primitives that control displaying the settings fields on the screen including container and tab primitives.
Please refer to the prior article in this series for more information about the function calls you see in the sample!
Saving Options
Our call-back function for saving options in the panel is called sp_keywords_admin_save_options. This is what that looks like:
function sp_keywords_admin_save_options() {
	check_admin_referer('forum-adminform_userplugin', 'forum-adminform_userplugin');

	$options = SP()->options->get('keywords');

    	$options['numchars'] = max(SP()->filters->integer($_POST['numchars']), 0);
    	$options['numkeywords'] = max(SP()->filters->integer($_POST['numkeywords']), 0);
    	$options['notification'] = SP()->filters->integer($_POST['notification']);

	SP()->options->update('keywords', $options);

   	 $message = __('Keywords options updated', 'sp-keywords');
   	 return $message;
}
You probably recognize this code – it is similar to the code for saving options that we showed in our prior article!
The first line of this call-back verifies that the screen being processed is indeed our settings form. After that, we retrieve the existing settings array and assign it to the $settings variable.
From there, we read the data from the $_POST variables, making sure to sanitize each value before saving to our database with an SP()->options-update function call.
Wrap-up
This article is very similar to our prior one. The major difference is with the initial action hook that allow you to insert a menu option under the Forum->Components menu item. We did show a different set of options just to keep things interesting but the flow is the same.
In our next article in this series we will be taking a look at doing some things on the front-end of the forums.
Appendix A: SubPanel Option FORM = 0
In the article above, we mentioned that the $subpanel array variable can have its form element set to 0 (zero) instead of 1 (one). What is the purpose of the zero option?
The zero option tells Simple:Press whether or not to display the html form and submit buttons. By default, we display them and plugins just add new items to the form.
But, if you need to embed a form in the form (i.e.: have multiple forms) then you put it to 0. This means that you now have to display the html form and submit buttons yourself.
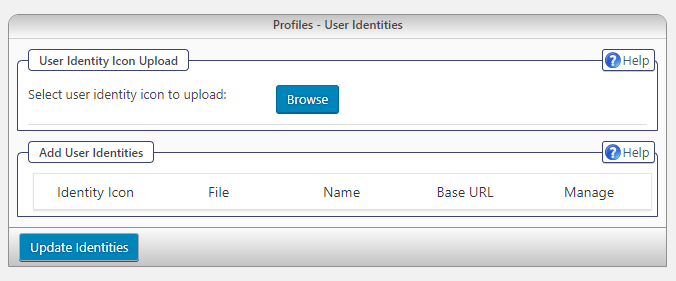
Take a look at the IDENTITIES premium plugin – it has an upload form for icons as well as another form. Therefore you can’t have the Simple:Press core display the normal form – you have to do it yourself since its more than one form.